Back in July I was invited to join the Henry Dress blog tour by the lovely Erin of Brooklyn Pattern Company. It was my first ever tour so I was super excited and made these cute little frocks.
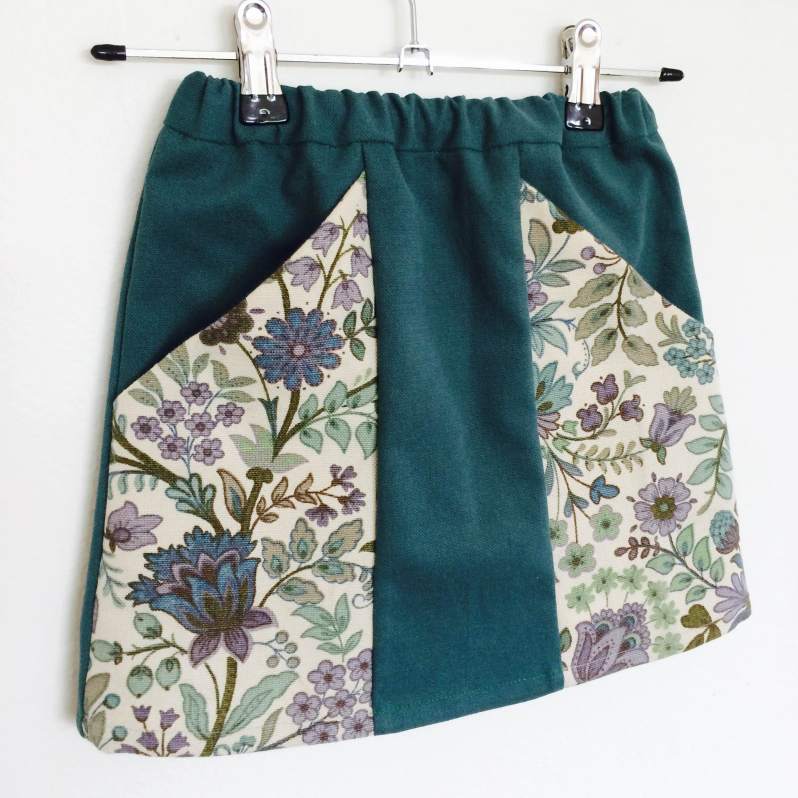
Not long after I made my first ‘Henry Skirt’ hack. I wanted to make a gift, I had a few pieces left over, but not enough for a dress, so the idea of the skirt was hatched. My dresses were a hit, but I wasn’t sure about the skirt.
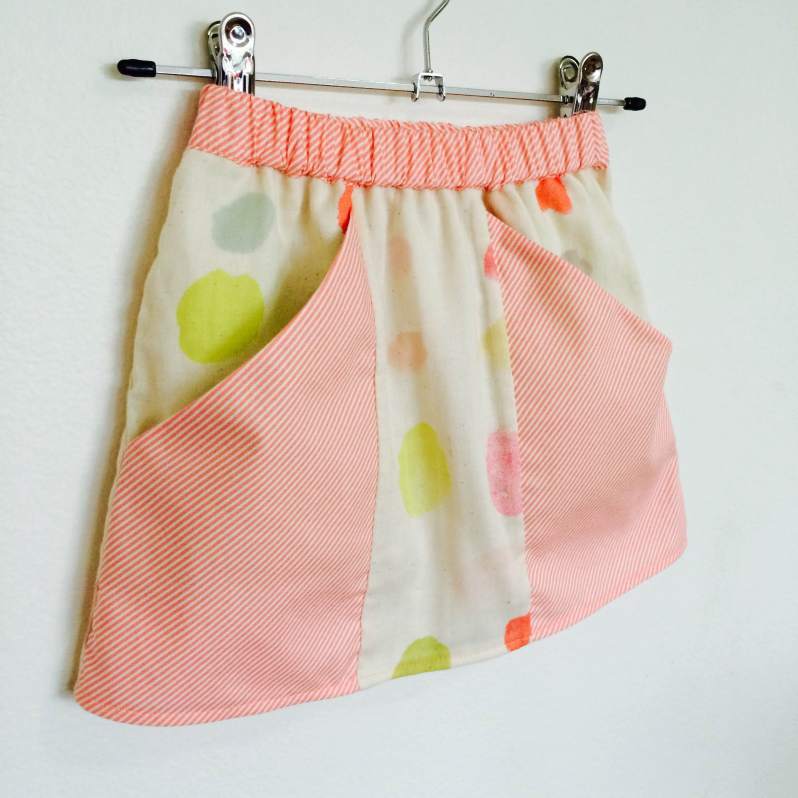
Do pattern designers mind when you hack up a pattern that they have spent months working on? Is this politically correct?
I have worked with many creatives over the years in advertising and design so I know that messing with creative can be a tricky business. But I bit the bullet and sent it to Erin, she hi5’d me and posted it on her Facebook page. She loved it, so much it seemed, that she asked me to write a little ‘how to’ tutorial.
How could I refuse, you know I love all things Henry!
It’s very easy to do, especially if you love the aesthetic of the dress but don’t have quite enough fabric or if you are a newbie and are a little nervous about neck facing and setting in sleeves. So, let’s get started…
PREP THE PATTERN:
Prepare the Henry Dress pattern pdf as per instructions. We will be using pieces 1 – 6 only. I am cutting a size 4, but this hack works with all sizes.
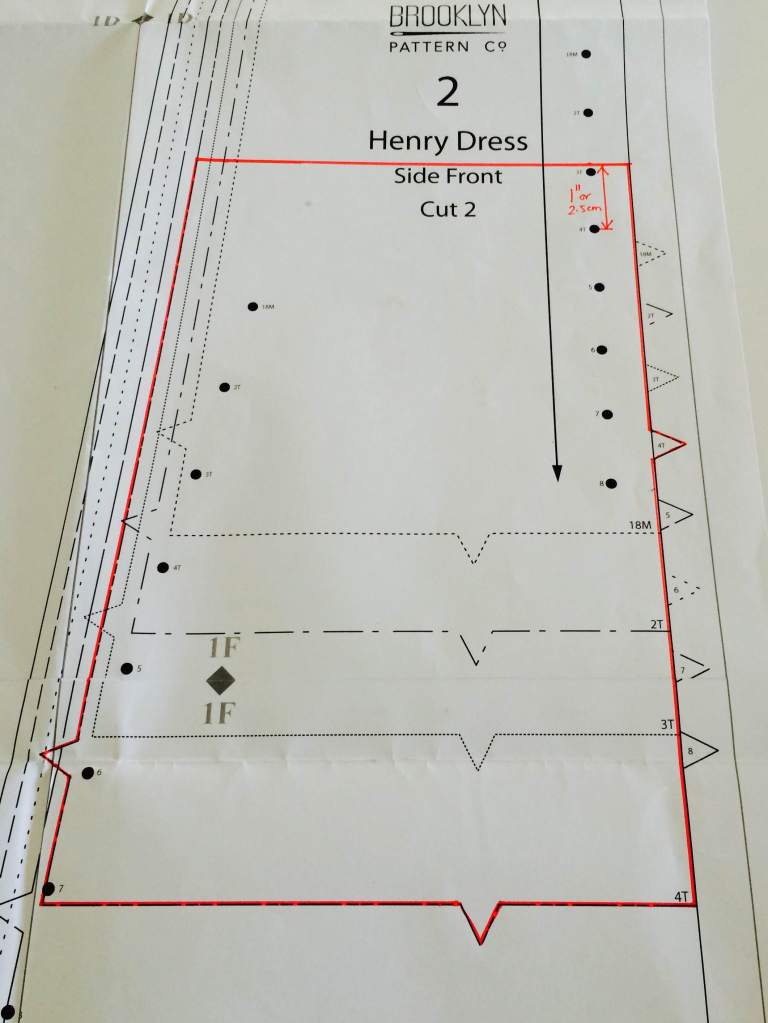
The best way to draw up the skirt hack, I find, is to grab a coloured marker (I used red) and mark up the skirt onto your dress pattern. Before I do this, I want you to know that I experiment as I have no conventional training. Newbies will thank me as I speak their language, experienced sewers will probably raise the odd eyebrow.
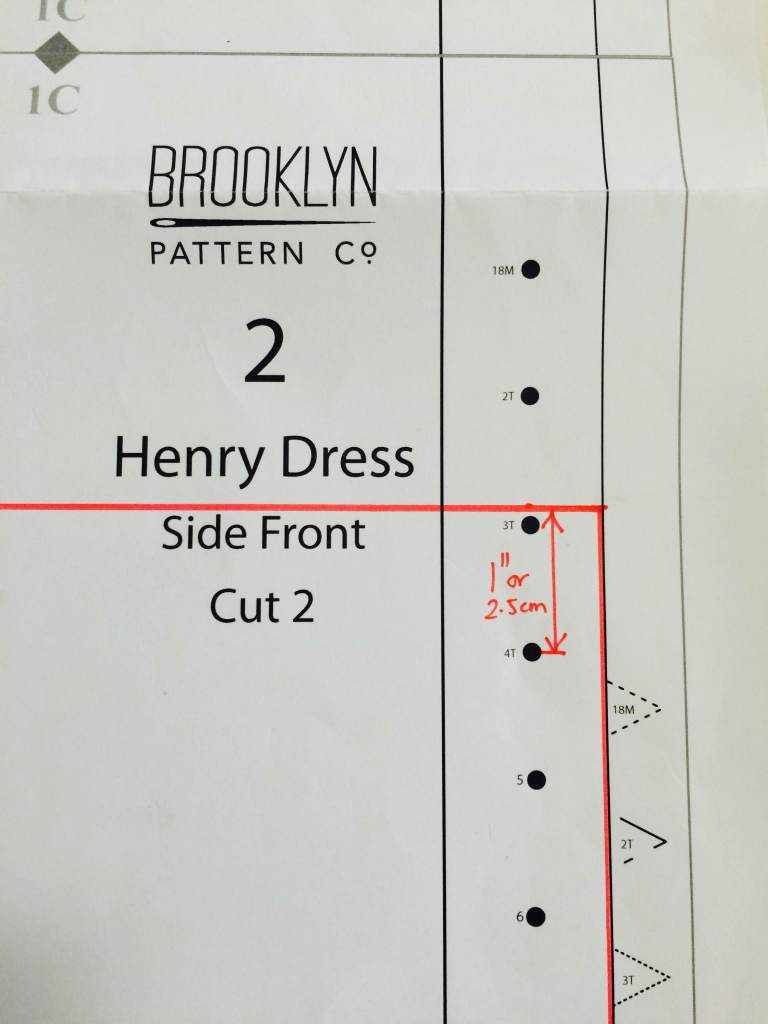


Trace off the POCKET (6) and POCKET FACING (5), no alterations are needed here.
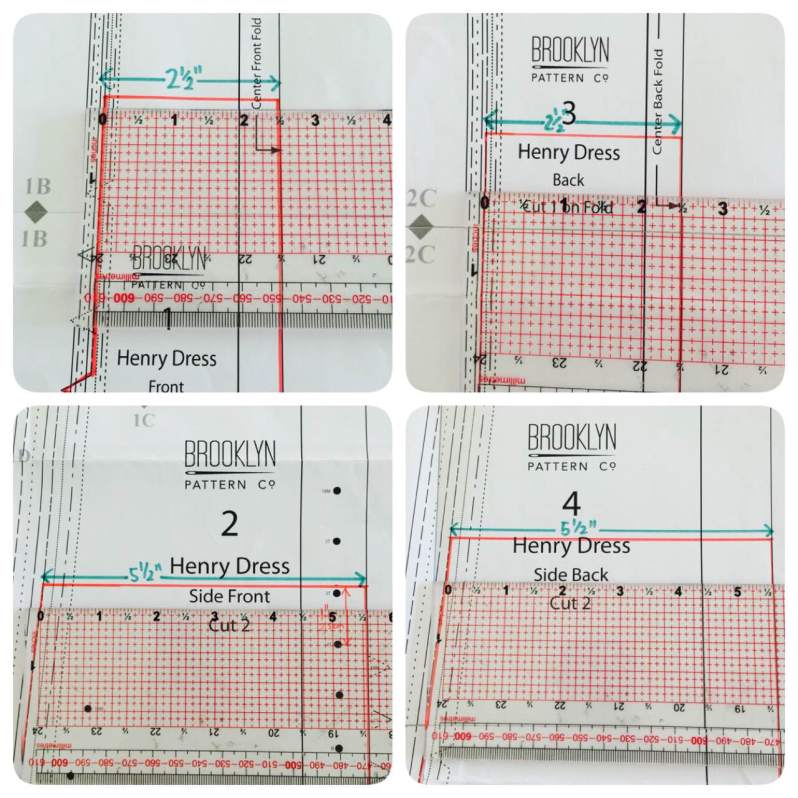
Finally, you’ll need to draw a WAISTBAND pattern piece, we will be inserting a 1 inch elastic into the casing, but of course you can use any size elastic, just change the formula to fit! Measure the waistline (drawn in red) on pieces 1, 2, 3 & 4, the measurements are marked in green (based on size 4).
Photo top left – FRONT = 2½ inches x 2 (note: it’s on the fold!) = 5 inches, then remove seam allowance (½ an inch off the 2 edges) = 4 inches
Photo top right – BACK = 2½ inches x 2 (note: it’s on the fold!) = 5 inches, then remove seam allowance (½ an inch off the 2 edges) = 4 inches
Photo bottom left – SIDE FRONT = 5½ inches x 2 (note: left & right sides!) = 11 inches, then remove seam allowance (½ an inch off the 4 edges) = 9 inches
Photo bottom right – SIDE BACK = 5½ inches x 2 (note: left & right sides!) = 11 inches, then remove seam allowance (½ an inch off the 4 edges) = 9 inches
Add them all together – 4+4+9+9 = 26 inches, now add back in a ½ inch seam allowance on each edge (there are 2 edges) = 27 inches
The waistband depth is 3 inches (1 inch for each side of the casing and an extra ½ inch on each edge (there are 2 edges) for seam allowance)
The pattern piece should be 27 inches x 3 inches. Draw this out to create a pattern piece.
FABRIC
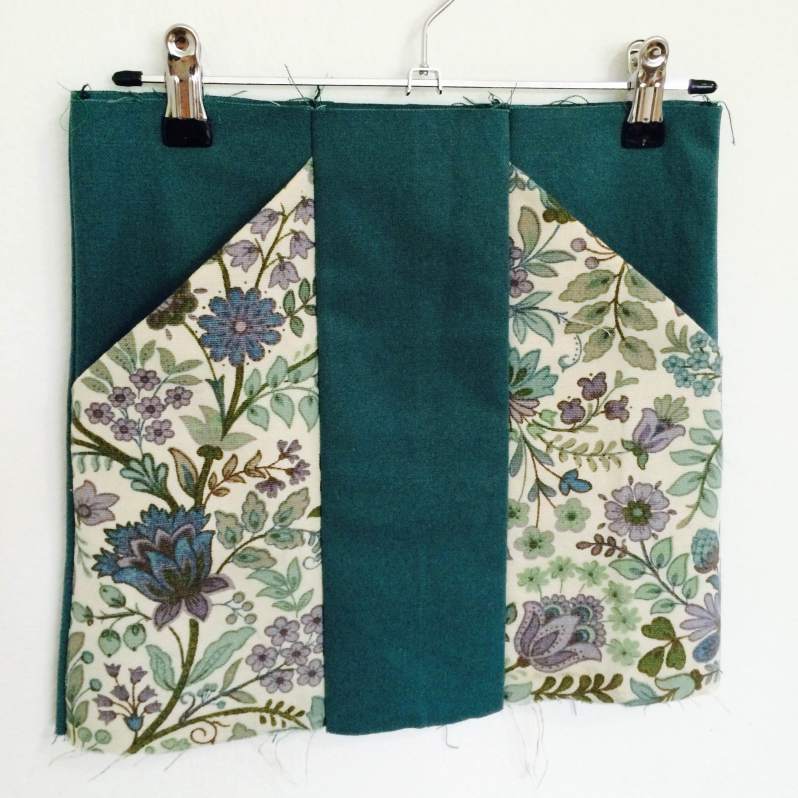
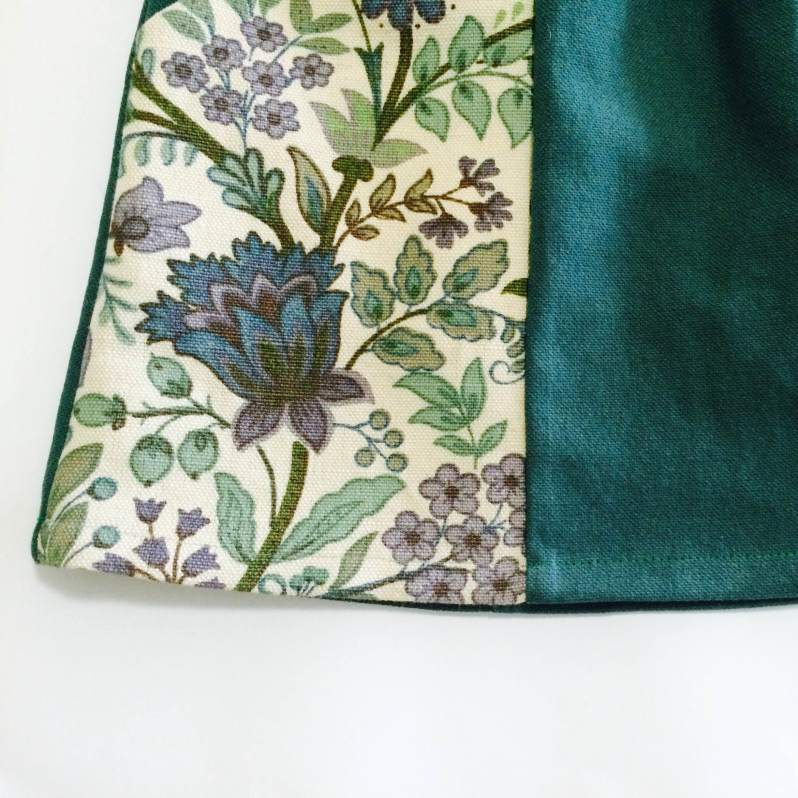
This pattern works really well with pretty much any cotton fabric. I have made the skirt in both heavy and light fabrics and they both work, but I do think a bit of weight helps the drape. So for the main body of the skirt, I am using an old faithful! This is a medium weight cotton drill in sea green, found in the charity shop for a dollar a metre. This skirt will be my fourth and final project from this fabric, it has worked as a pair of adventure pants, a gilet and a pair of parsley pants!
I am more excited about the pocket fabric though. This is a bag I have had for a while, a little retro piece gifted to me from my sister. While it’s cute, it’s very small and not user friendly but as pockets it will work a treat!
It’s made of sturdy stuff, it’s a heavy cotton drill, in the most beautiful shades of green and blue. I have already patched my jeans in it.
I digress….
CONSTRUCTION:
Get your Henry Dress instructions at the ready! Lay out your pattern pieces as per page 2, pin & cut.





THERE’S MORE….
As Erin at Brooklyn Pattern Company is a complete gem, she is offering a Henry Dress pattern to one of my lucky readers. So, not only could you own my favourite girls dress pattern, you can also make the skirt hack too. Eeek!
All you have to do is tell me “Who’s your favourite Henry?” in the comments section below and Erin will choose a winner on 1st December.
Good luck!




After my late grandfather Henry (and 2 cousins Henry, yes, names are a family thing!), one of my favorite artits is Henri Matisse, french sculptor and painter.
LikeLike
Love a Henry, my grandfather was a Henry too and my son now carries it as a middle name!
LikeLike
My friend’s nephew is a Henry!
LikeLike
There are lots of great Henry’s out there. For my kids probably Henry the Hoover (the one with the face) and for my husband Henry the mild mannered janitor aka Hong Kong Phooey. For me my late Uncle Henry who used to read endless stories to us when we were little.
LikeLike
Hong Kong Phooey – totally forgot that! What a great blast from the past!!
LikeLike
YOU ARE OUR WINNER!!! Well done, could you drop me an email at sewingwithkate@gmail.com so we can get your pattern to you. x
LikeLike
It may sound weird, but I have not known/remember any Henry in my life. Well except this Henry dress pattern.. Since she is the only one Henry I know and I love sewing for little girls, I shall declare that Henry dress pattern is my favourite Henry!
LikeLike
Lol! Love it!
LikeLike
Very clever hack and beautiful fabric choices. My favorite Henry is a little star wars loving neighbor I had when I lived in Brooklyn a few years ago. Miss watching him play in the backyard garden from our upstairs window.
LikeLike
Lovely!
LikeLike
Really adorable skirt! Great work! I literally know no Henry’s in person yet. Any day, though, I’m sure…
LikeLike
Keep your eyes open, they are the best kind of people!
LikeLike
Hmm. So many Henrys to choose from. I’m going to have to go with my friend’s child who once plaintively asked his mom not to return a large tank top she had bought by mistake because “that’s my favorite dress!!” Maybe I’ll make him a Henry.
LikeLike
Love it!
LikeLike
As a sports/Arsenal fan, does Thierry Henry count? That’s the only Henry I could think of!
LikeLike
Yes he counts, my son is s massive Arsenal fan so he would approve greatly!
LikeLike
My favourite Henry is my dear and longtime friend Beth Henry who, even after getting married, decided she couldn’t part ways with the strong Henry name. She is one fierce not to be messed with New Yorker lady Henry who I’m privileged to be such good friends with still…
LikeLike
I love the sound of Beth Henry – love a powerful woman!
LikeLike
THANK YOU THANK YOU for all your wonderful comments. We have a winner! Pecia! Well done. I look forward to seeing your Henry dress soon x
LikeLike